Pages

Assorted Donuts / Doughnuts

Recently I have been hearing about many outlets selling donuts in Bangalore and people going "mad over donuts" :-).....So, I decided to try making these donuts which turned out to be relatively simple. There is no baking but deep frying involved in this recipe (of course we can make baked donuts as well but I deep fried them). Donut can be termed something in between bread and cake....Bread because yeast is added and cake because butter is added. We can enjoy donuts anytime of the day, be it breakfast, snack or even meal by itself! 


Ingredients:


For Donuts - 

Plain flour (maida) : 3-1/4 cup + for dusting
Powdered Sugar : 1/4 cup + for dusting
Active Dry Yeast : 2 tsp
Milk : 3/4 cup
Eggs : 2
Softened unsalted butter : 110 gms
Vanilla Essence : 1 tsp
Oil for deep frying

For Glaze - 

Granulated sugar : 1/4 cup
Milk : 6 tb sp
Dark chocolate : 50 gms (tempered)
Rainbow sprinkles


Method:


  1. In a bowl, sprinkle active dry yeast over luke warm milk. Add 1 tsp sugar to help activate the yeast. Keep it aside for 10-15 minutes until yeast foams well
  2. In another big bowl, sieve the flour so that it gets aerated well. Add to it 1/4 cup of sugar and mix well
  3. Beat two eggs lightly with the help of fork and add it to the flour. Add vanilla essence and mix it well with spatula
  4. Add well foamed milk and yeast mixture and also softened butter. Mix well and bring all the ingredients together
  5. Knead the dough for 5 minutes until it is forms a soft ball and no longer sticks to the bowl
  6. Keep in a warm place for 1 to 1.5 hours or until the dough doubles up in volume
  7. Punch the dough to take out the air from dough and allow to rise the dough again for 30 minutes
  8. Once again punch the dough and then keep it in freeze for 30 minutes so that the dough becomes pliable for rolling
  9. Lightly dust the floor with some flour and then roll the dough using rolling pin in 1/2 inch thick round. (For small / mini donuts, keep the thickness to 1/4 inch)
  10. Using donut cutter, cut out the donuts and arrange it in tray / plate. Keep covered using plain cloth at a warm place for 30-45 minutes until these donuts rise again
  11. Deep dry donuts in oil on medium until these turn golden brown and place these in a plate
  12. Dust the powdered sugar on the hot donuts
  13. For chocolate donuts, dip the cooled donut in tempered chocolate and take it out. Take rainbow sprinkles in a plate. Dip the wet chocolate side of donut in the sprinkles so that it gets coated well. Arrange it in plate
  14. For sugar glaze, mix granulated sugar and milk in pan and boil until sugar dissolves and mixture thickens a bit. Allow it cool. Dip the donuts from one side in the glaze and arrange it on the plate
  15. Serve the donuts either warm or even cold


Fluffy Pancakes

Now a days, our Sunday also starts very early since my younger son has his classes in the morning. Today I decided to make simple but healthy breakfast of Fluffy Pancakes served with honey and maple syrup. Pancakes can also be served by garnishing it with fresh fruits, fruit crush or jelly etc...


Ingredients


Flour / Maida - 1 1/2 cup (approx. 185 gms)
Milk - 1 1/4 milk (approx. 300 ml)
Egg - 1 no.
Baking powder - 4 tsp
Salt - 1 tsp
Sugar - 1 tbsp
Butter - 3 tbsp (melted) (approx. 42 gms)
Vanilla Essence - 1 tsp

Makes around 10-12 medium sized pancakes 

Method

  1. In a large bowl, mix together flour/maida, baking powder, salt and sugar
  2. Add to it melted butter, egg and milk
  3. Mix together with hand blender until it is smooth
  4. Add vanilla essence and mix well
  5. Keep aside for 15 minutes
  6. Take a non-stick pan. Grease it with little butter / oil and heat it on low to medium heat
  7. With the help of ladle, pour approximately 3-4 tbsp of batter on the hot pan and spread evenly to form around 5 inch diameter circle
  8. Cover the pan with lid and allow to cook for 3 minutes so that bottom is golden brown
  9. Turn the pancake over and cook covered for another 3 minutes so that other side also becomes golden brown
  10. Take out from the pan and serve with honey, maple syrup, cut fresh fruits or jelly


Chicken Ghee Roast

Being weekend, we have to have non-veg food; at least that is the expectation of both my sons. Today, I decided to try chicken ghee roast. It is one of the most popular dishes from Mangalore. This dish is supposed to be spicy and usually served with Neer Dosa or Ghee Rice. Large amount of ghee goes into making of this dish but that is what brings the flavor to this tasty Chicken Ghee Roast.......


Ingredients:


Chicken - 1 Kg (cut into smaller pieces)
Ghee - 4 tbsp
Sugar - 11/2 tsp
Curry leaves - 5 to 6 for garnishing


For Marination:


Curd - 1 cup
Lemon juice - 1 tsp
Kashmiri Red Chilli Powder - 2 tsp
Salt - To taste

For Spice Paste:


Corriander Seeds (dhania) - 2 tbsp
Cumin Seeds (jeera)- 1 tsp
Black Peppercorns (kali mirch) - 6-7
Fenugreek Seeda (methi) - 1/2 tsp
Garlic - 10-12 flakes
Tamarind - small lemon sized ball
Dry Red Chillies - 6-7 (if using "byadagi" chillies, then use 10-12)
Water - 2 tbsp or as required

Method:

  1. Wash chicken pieces well. Marinate it with curd, lemon juice, red chilli powder and little salt. Refrigerate for 2-3 hours (I did it for one hour).
  2. In a flat pan, dry roast red chillies on medium flame for 4-5 minutes. Keep aside to cool.
  3. In the same pan, take 1 tsp ghee and roast corriander seeds, cumin seeds, black peppercorns on low flame for 4-5 minutes (make sure not to burn these spices). Keep aside and allow to cool.
  4. Grind the roasted spices, red chillies, garlic flakes and tamarind together with 2 tbsp water to form a fine paste. Add little more water if paste is still too dry and difficult to grind.
  5. In a non-stick pan, heat 2 tbsp ghee, add chicken pieces and cook covered on medium to high flame until chicken is almost cooked (it took around 8-10 minutes). Transfer the chicken pieces to another vessel and released juices / liquid to a separate bowl.
  6. In the same pan, add remaining ghee, add ground spices and saute on medium flame for 5 minutes until ghee leaves the sides of the pan.
  7. Add to it cooked chicken and reserved juice / liquid from the bowl. Add salt to taste. Saute well for 3-4 minutes. Make sure that all the chicken pieces mix well with spices.
  8. Add sugar and mix.
  9. Cook for 10 minutes on low to medium flame until chicken is cooked, juices are almost dried up and all chicken pieces are coated well with masala.
  10. Remove in a bowl. Garnish with curry leaves.
  11. Serve with white rice, ghee rice or Neer Dosa

Pavlova Miniatures

Yesterday, I had been for lunch at a restaurant and they had Pavlova as one of the many options for dessert. Pavlova is meringue based dessert having delicate but crisp crust and soft marshmellowy center. It is typically served by decorating the top with whipped cream and fresh fruits like Strawberries, Kiwi, Passion Fruits etc. This dessert is said to be created first either in Australia or New Zealand. After having tasted this lovely dessert, I decided trying to recreate it.


The base of Pavlova is made by slow baking the firmly beaten egg whites and then garnishing it with whipped cream, fruits crush and fresh fruits.

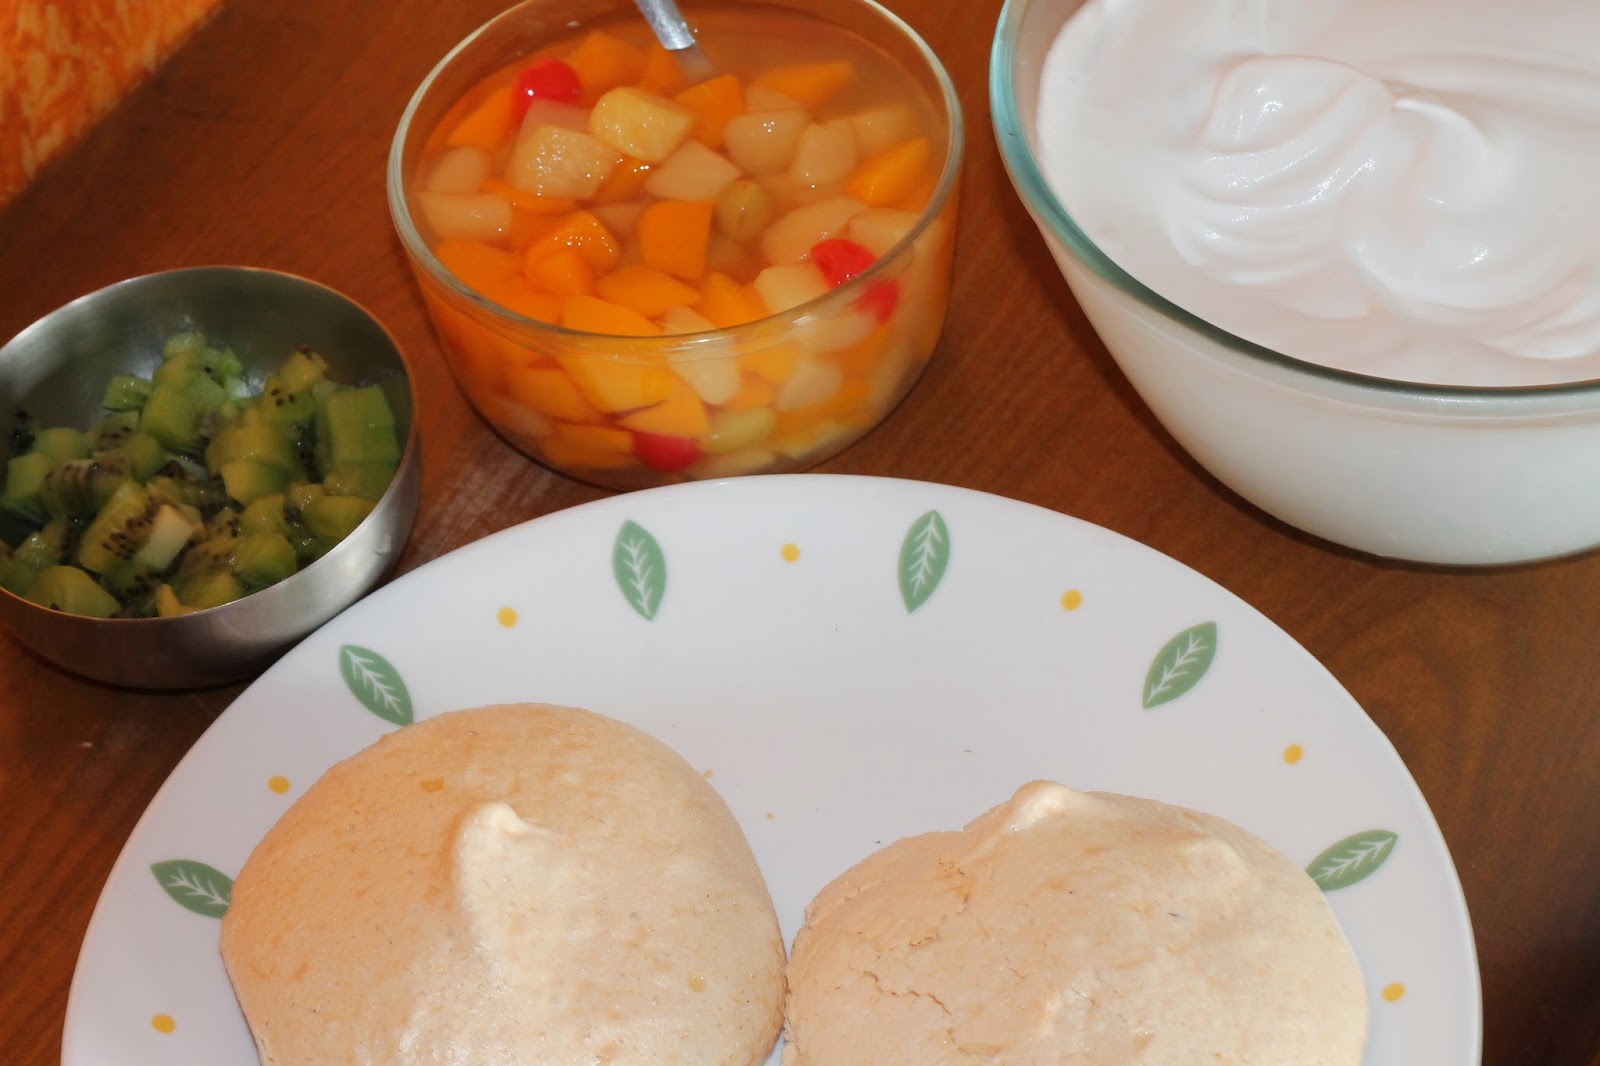
Baked Meringue Bases, Whipped Cream and Fresh Fruits

Ingredients


Egg Whites - 4 (make sure not even a drop of egg yolk is mixed)
White Sugar - 225 gms (finely ground)
Cornflour - 2 tsp
White Vinegar - 2 tsp (you can substitute it with lemon juice)
Vanilla Essence - 1 tsp
Whipping Cream - 250 ml
Kiwi Fruit - 2 nos.
Peach - 1 no.
Strawberries - 10-12
Fruit Crush - 3/4 cup (I used Mala's Very Berry crush)

Makes 9 Pavlova miniatures of 4 inch diameter

Method

  1. Pre-heat the oven at 150 degrees centigrade
  2. In a sufficiently big bowl take egg whites and beat until they hold firm peaks but are not stiff
  3. Gently add sugar, one spoon at a time while beating continuously. Make sure that all the sugar is dissolved completely and then beat further until you get snowy and shiny meringue but it is not dry. (Ensure not to over beat the meringue else egg whites loose volume and deflate when folded with other ingredients)
  4. Sprinkle cornflour, vinegar and vanilla essence on top and gently fold in the meringue to combine
  5. In the baking tray, keep the silicone baking sheet (alternatively you can use baking sheet lined with parchment paper)
  6. Spoon the meringue on the baking sheet and spread in approximately 4 inch diameter circles with 1 inch spacing between them. Try to make the rim little higher than the center so that it can hold whipped cream and fruits later (unfortunately, my meringues were not indented in center. You can use backside of the spoon to make indentation in center)
  7. Put the baking tray in the oven, reduce the temperature to 130 degrees and bake for around 50 minutes or until the surface is slightly light brown and is hard if touched
  8. Switch off the oven, keep the oven door slightly open and allow it to cool inside the oven itself for around 30 minutes.
  9. Once cooled, transfer to wire rack
  10. Meanwhile, peel and cut the fruits
  11. In a cold vessel, take whipping cream and beat it until soft peaks are formed. (Add 1 tbsp sugar while beating if whipping cream is unsweetened)
  12. While assembling the Pavlova, put a dollop of whipped cream on the baked meringue based and smooth it from all the sides. Place a spoonful of fruit crush and then place cut fruits on top
  13. Enjoy the tasty Pavlova


Tip: If you are not assembling the Pavlovas immediately, baked meringue bases can be stored in airtight container in the refrigerator for 3-4 days

Vegetable Spring Rolls

Ingredients

For The Coverings 

1/2 cup maida
1/2 cup cornflour
3/4 cup milk
2 tsp melted butter
a pinch salt

For The Stuffing

1 tbsp oil
1/2 cup chopped spring onions whites
1 1/2 cups mixed vegetables (french beans , carrots , cabbage) , cut into thin strips
3/4 cup bean sprouts
1/2 cup boiled and roughly chopped noodles
1/2 cup chopped spring onion greens
2 tsp soy sauce
salt to taste

Other Ingredients

3 tbsp plain flour (maida) dissolved in 1/4 cup water
oil for deep-frying

For Serving

Szechuan sauce

Method 

For the covering

  1. Combine the plain flour, cornflour, milk, salt and ½ cup of water in a bowl and mix well till no lumps no remain.
  2. Grease a non-stick pan with butter, pour 2 tbsp of the batter into the pan and tilt it around quickly to make a 100 mm. (4”) diameter thin circle.
  3. When the sides begin to peel off, turn the pancake and cook on the other side for 30 seconds.
  4. Repeat with the remaining batter to make 11 more pancakes.

For the stuffing

  1. Heat the oil in a wok /kadhai on a high flame till it smokes.
  2. Add the spring onion whites, mixed vegetables, bean sprouts and msg and sauté on a high flame for 3 to 4 minutes.
  3. Add the noodles, spring onion greens, soya sauce and salt and sauté on a high flame for another 2 minutes.
  4. Divide the stuffing into 12 equal portions and keep aside.

How to Assemble

  1. Place a panacke on a flat, dry surface and place a portion of the stuffing on one of its edge
  2. Apply a little flour paste along the edges of the pancake.
  3. Fold the top edge over the mixture to seal it firmly.
  4. Fold the left and the right side of the pancake in order to get a rectangle.
  5. Roll the pancake downwards tightly sealing the ends securely with the flour paste.
  6. Repeat with the remaining ingredients to make 11 more rolls.
  7. Heat the oil in a wok / kadhai and deep-fry in batches till they turn light brown in colour.
  8. Cut each roll into 2 equal portions and serve hot with schezuan sauce.

Moong Dal Cheela

Ingredients


Moong Dal - 2 cups
Rice - 1 cup
Red chilli powder - 1/2 tsp
Dry Red Chillies - 12-15
Ginger - 1/2 inch
Garlic - 5-6
Salt to taste
Vinegar or lemon juice 1 tsp

Method


  1. Soak moong dal and rice together for around 1 hour. 
  2. Strain dal & rice and grind it little coarsely in mixer. 
  3. Add to it little salt, red chill powder. Add little water and make the batter like dosa batter consistency.
  4. Soak red chillies for 15 minutes in warm water. 
  5. Make fine paste with soaked red chillies, ginger, garlic, salt and vinegar / lemon. Keep it aside.
  6. Heat a nonstick pan and pour the batter with laddle and spread it evenly. Put little oil all around. 
  7. Spread red chilli paste using a spoon all over the cheela. Make it light brown from one side and then reverse it on the pan. 
  8. Cook for 30-45 seconds on other side. Serve hot.

Coconut Milk & Mango Panna Cotta


For Coconut Milk Panna Cotta Layer:
Coconut milk          200 ml
Heavy cream          300 ml
Granulated Sugar    8 tbsp
Vanilla essence       1 tsp
Gelatin                    3 tsp
Water                               6 tbsp

For Mango Panna Cotta Layer
Mango Puree                    250 ml
Heavy Cream                   300 ml
Castor Sugar                    5 tbsp
Gelatin                              3 tsp
Cold Water                      6 tbsp

Method

For Coconut Milk Panna Cotta:
  1. Sprinkle gelatin over a cold water and leave for 5 mins to bloom
  2. In a heavy sauce pan heat together coconut milk, cream, vanilla essence and sugar  just till one boil (don’t over heat it)
  3. Take it off  the  stove and add white chocolate
  4. Add the gelatin mixture in it and stir well till dissolves
  5. Let it cool for 2-3 minutes
  6. Pour it in glasses to be served, tilt it in muffin pan to give an angle effect
  7. Refrigerate till set

For Mango Panna Cotta Layer:
  1. Sprinkle gelatin over 3 tbsp water and allow it to rest for 5 minutes
  2. In a pan heat sugar and cream till sugar is dissolved. (Do not boil it too much)
  3. Remove from heat, add gelatin mixture and stir until gelatin is dissolved completely        .
  4. Cool for 2-3 minutes.
  5. Add mango puree to the cream gelatin mixture and mix very well.
  6. Pour the mixture in the same glasses where coconut milk panna cotta is already set.
  7. Refrigerate till set.

Chicken Ghassi

Ingredients:


Chicken 1 kg curry cut

Coconut grated
Onion - 2 medium cut in 4 pieces
Onion - 1 medium finely chopped
Coriander Seeds - 3-4 tbsp
Cumin Seeds - 2 tb sp
Black Peppercorn - 8-10
Clove - 3
Fennel seeds - 2 tsp
Dry Red Chilli - 10-12
Tamarind - lemon sized ball
Oil - 2 tsp
Ghee - 2 tsp
Coconut Milk

Method:


  1. Marinate chicken with salt, lemon, salt and little red chilli powder. Keep in freeze for at least 30 minutes.
  2. In a hot pan, put 1 tsp oil, dry roast coriander seeds, cumin seeds, cloves, peppercorn and fennel seeds. Roast until fragrant....keep it aside and allow to cool....
  3. Roast coconut in the same oil until fragrant.....Grind coconut, roasted spices, tamarind and 2 medium sized onion into a smooth paste
  4. In a pan, put 2 tsp oil and 2 tsp ghee....add finely chopped onion....saute till golden brown.
  5. Add above ground paste and saute till it starts releasing oil.
  6. Add marinated chicken.. Saute well and cook covered for 10 minutes so that chicken pieces as coated well with masala and it is now cooked.
  7. Add coconut milk, salt to taste and sufficient water so that it has little thick consistency....Boil for 5 minutes.

Dulce De Leche

Wikipedia says that "Dulce De Leche" is South American Confection prepared by slowly heating sweetened milk. Literally translated, it means "candy of milk" or "milk toffee" or "candy jam". This can be used with cakes, jams or even as "bread spread". I came across Dulce De Leche when I was looking for recipe of Banoffee Pie. The most basic recipe for this "milk toffee" calls for slowly simmering milk and sugar together stirring continuously for long hours until the mixture thickens and caramelizes.

At home, usually Dulce De Leche is prepared by boiling an unopened can of condensed milk for 2-3 hours. But there is also a simpler or faster way to make it by using the pressure cooker. This is the method I used to make this delicious Dulce De Leche.


Ingredients:


Nestle Milkmaid / Amul Mithaimate Tin - 1 No.


Method:


  1. Take 8 or 10 ltrs. pressure cooker and fill it halfway with water
  2. Remove any plastic wrapper / cover from condensed milk tin, if any. Ensure that the can is not opened at all.
  3. Submerge the can fully, horizontally in water. Ensure that water is covering the can completely and is at least 2-3 inches above the top of the can.
  4. Cover the cooker lid, place the whistle / weight and pressure cook on medium  to high heat until one whistle. In my case, this took around 20 minutes 
  5. After the whistle, lower the heat to low and continue cooking for another 20-25 minutes with cooker lid as well as whistle still on (there will not be any more whistles while cooking on low heat)
  6. Turn off the heat and allow the pressure to drop.
  7. Open the cooker lid, remove the can carefully (remember that the can will be very hot)
  8. Allow the can to cool completely (it might take 1 to 1.5 hour)
  9. Once can cools, open the lid and relish your Dulce De Leche
  10. This can be stored in refrigerator for about 7 days (it will get thickened further after refrigeration. So, you can heat it in microwave for 1 minute or so before using it)
  11. You can also use 1 tsp vanilla essence before refrigeration.
Tip:
  1. During my first attempt, I used a smaller cooker and even if I lowered the heat to low after first whistle, it continued to whistle and then I turned off the gas after 3 whistles. I found that the final product was not caramelized properly. Probably, I could have continued cooking it further for 2-3 whistles
  2. Increasing or reducing the cooking time will make the final product thicken more or less. Adjust cooking time as per your taste in subsequent attempts